Creating a Random Lesson
|
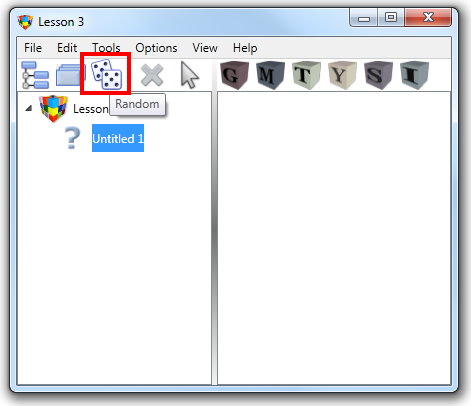
To create a Random Lesson, on the Lesson dialog:
|
|||
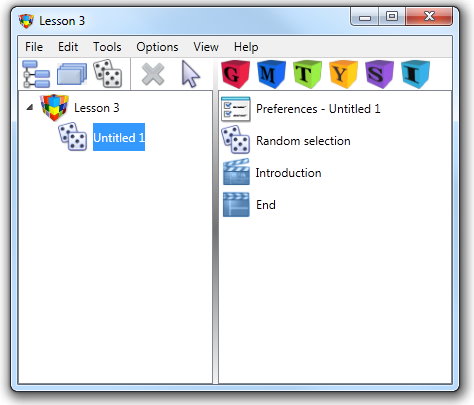
The blank Lesson Type icon will be replaced by a Random icon.
With the Random icon highlighted, the Contents list will show the Preferences, Random Selection, Introduction, and End icons for the random sequence. Highlight any of these icons and click the Edit button to display the Random dialog. The Preferences, Introduction, Element and End and Response tabs function almost the the same as those in the Sequential dialog. However a random lesson adds a further tab called the Random tab. You can view detailed information about the Preferences, Introduction, End and Response tabs in the Help topic Creating a Sequential Lesson. |
||||
Random tab |
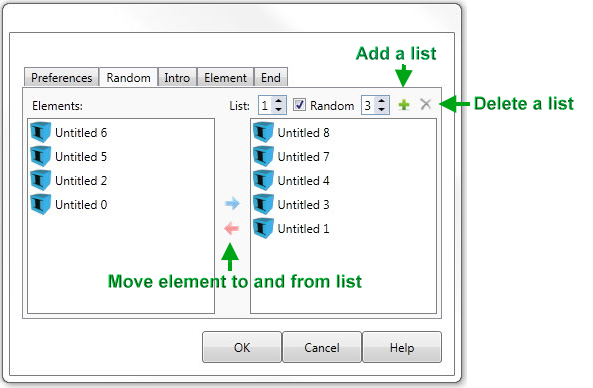
The Random tab allows you to define in which order the Elements contained in the Random Lesson are presented to the trainee. Note: Generally you would not define the settings on this dialog until all of the Elements have been added to the lesson. Detailed information about this process is covered in Adding Elements to a Lesson .
|
|||
|
||||
The dialog contains two lists: an Element list and a Display list.
|
||||
Element list |
The left list is the Elements list which displays the Elements you have created. The Element list retains the order of the Elements as they appear in the content list of the Lesson dialog. |
|||
Display list |
The list to the right is the Display list where you define which Elements will be presented during a lesson. |
|||
To add an Element to the Display list:
The Element will then appear in the Display list. As that Element has been selected it will now appear grey in the Element list. |
||||
To remove an Element from the Display List:
|
||||
|
To paste the Element in a different position within the Display List:
|
|||
Display order |
When you have added Elements to the Display List you have the choice of displaying them in the order in which they appear in this list or in a totally random order. To display the Elements in the order in which they appear uncheck the Random Check box. Select the Check box to display the Elements in a random order. With the check box set, a field will appear allowing you to define how many Elements will be presented from the Display list. Set the value of the field to the number of Elements from the Display List you wish to have displayed to the user. |
|||
Multiple Lists |
You are also able to define multiple Display lists. For example you can create one Display list containing Elements 1, 2 and 3. Then create another Display list, (list two) with Elements 4, 5 and 6. You could then decide to present list one in the order in which each Element appears and present the Elements in list two in random order. Alternatively you could choose to display only one of the three Elements in list one and all three of the Elements in list two and so on. |
|||
To create multiple Display lists:
When the Lesson runs AUTHOR™ will execute each Display list in numerical order starting with Display list one. |
||||
|
To remove a Display list:
|
|||
|
To insert a Display list between two existing display lists:
|
|||


